
In the last part you learned how to make a basic Google Form. This section will expand your knowledge of Google Form creation. Not only will you create a form with a variety of question types, we will also add images, videos, titles, and sections. Finally, you will create multi-branching forms where specific responses will lead users to different questions.
Creating an Interactive Form
Having learned how to create a basic form in Chapter Two, you will be tasked to create a quick form that we will add new, and interactive elements to.
Adding Advanced Features
What we will learn in this section:
- How to add an image
- How to add a video
- How to add a title
Step 1: Set up a Basic Form
To begin, create a new form titled “Gender and Video Games”
Add the following three questions:
How familiar are you with Video Games?
- Change the question type to “Linear Scale.” This is a new type, but it is similar to multiple choice. The only difference is it will create the options of 1 to 5.
- In the space provided label 1 “Unfamiliar” and label 5 “Very Familiar”
- Add a description that reads “Select the number which best represents your level of familiarity with video games.”

Which elements do you commonly find in video games?
- Create a check box question with the following options:
- Strong Male Characters
- Strong Female Characters
- Sexualized Male Characters
- Sexualized Female Characters
- Rescuing Male Characters
- Rescuing Female Characters
- Killing Male Characters
- Killing Female Characters
- Kidnapping Male Characters
- Kidnapping Female Characters
Note: You can copy and paste a number of choices into your form, so long as they are formatted as one choice per line.

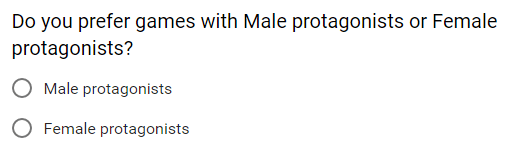
Do you prefer games with Male protagonists or Female protagonists?
- Create a multiple choice question with two options:
- Male protagonists
- Female protagonists
Step 2: Adding Images to Your Form
 To add an image to your form, you need to click the Add Image button on the Insert Options toolbar.
You can choose to upload an image from your computer, paste the URL to an image, take a picture using a webcam, or add an image from your Google Drive.
However, the easiest way to add an image to your form is to click on the Search option. This allows you to search Google Images for a specific image.
For our purposes search for “Video Game Characters”
You can refine your search by colour, if you want to keep a specific theme. Right now, you are searching for an image that displays a number of video game characters. Choose one that suits your needs by clicking on it.
 Then click the select button in the bottom left. This will add the image to your form.
Use the movement tab to drag the image all the way to the top of your form.

Step 3: Adding a Video to Your Form
 Adding a video is nearly identical to adding an image. Click on the Add video button, search for an appropriate video, and click the select button.
For our purposes search for a video about video game characters. I searched for “Cammy vs Guile” and selected:【SSF4 AE Ver.2012】Cammy (Kitano Takeshi) vs Guile (COMEON0418788) – Endless Battle
I used this video because Cammy and Guile are essentially the same character (highly trained western military officers) – however, a number of gender distinctions are obvious when comparing the two.
You can feel free to adding a video about Mario Kart, Zelda, or anything else that is relevant to video games.
Once you have added this video, use the movement tab to drag it above your second question.
Step 4: Directing Users to View the Video
Once the video has been added, and placed above the question Which elements do you commonly find in video games? add a description to the question.
The description should read: To answer this question, use your own prior knowledge, as well as information gained through watching the above clip.
Step 5: Resizing and Aligning the Video
 Click on the video, and you will see a blue rectangle with four square anchor points in the corners. Click on the bottom left anchor and drag it, to enlarge the video.
 Next, click to the side of your video clip and you will notice a three-dot-menu is displayed. Click on it, and select “Center align”.

Step 6: Adding a Title
 Adding a title is even easier than adding an image for video. Simply click on the Add title button, and an “Untitled Title” will pop up.
Rename the title “What do You Know?” and drag it to the top, using the movement tab.
Copy the title, just like you would copy a question. Rename the copy to “Video Game Characters” and drag it above the video you added.
Copy that title, and rename the copy to “What do You Prefer?” and drag it above your final question.
Now, when you preview your form, you will see that each question has its own heading. You may want to use less headings on your own forms, going forward. The colour of the title changes depending on the theme you have selected.

Note: You can also add a description below titles if you want. This can be a great way to create different parts of your form.
Creating Sections
What we will learn in this section:
- How to add Sections
- How to add data validation to questions
- How to duplicate a section
- How to choose sections based on answers
Step 7: Creating a New Section
 Forms can be broken up into sections. Each section is a different “screen” for the user. This can be useful when you want a user to be focused on a new idea or concept in your form. It can also help keep a multi-question form from scrolling ever-downwards, without end.
To create a new section, simply click on the Add section button on the Insert Options toolbar.
Note that the new section will be created directly below your currently selected object (question, titile, image, or video).
If you make a mistake, you can either use the keyboard shortcut [CTRL+Z] to undo the creation of the section, or you can click on the three-dot-menu for the section, and select “Merge with above”.
Note, you can also drag objects between sections, just as you would move them around on a form without sections.
Ensure that your new section is created after the final question. Rename it from Untitled Section to Female Protagonists.
Now, after your last question, there is a button to go to the NEXT page, rather than a submission button.

Step 8: Populating Your New Section
Create the following three questions:
How are women in video games normally represented?
- Make a check box question with the following options:
- Heroes
- Victims
- Playable characters
- Non-playable characters
- Strong
- Weak
Do you see your values represented in female video game characters?
- Make a multiple choice question with the following options:
- Yes
- No
Explain what values you see, or do not see, represented in the characters?
- Make a paragraph question
Step 9: Data Validation
Through data validation we can add certain requirements to our questions. For example, if we wanted the user to consider a number of different ways women are portrayed in video games, we might want them to pick more than one of the six options. However, perhaps we don’t want them to pick all of them. We want them to be specific.
First, add a description to the question that reads Choose the three options that best apply.
 Note that when you went into the three-dot-menu to add a description to the question, there was also an option reading “Data Validation”. Click it.
New options will have appeared at the bottom of your question.

Choose Select exactly, change the number to 3, and add a custom error text of “You must select exactly three options.”

Failure to add a custom error message will display the default of “Must select exactly 3 options”
Step 10: More Data Validation
Now that you’re an expert of Data Validation, add some to your paragraph answer as well. Note that the type of data validation is different for this question. You aren’t adding restrictions on what options the user can choose, instead you’re ensuring they have a specific character count.
Since the average word length in English is five characters, set the minimum character count to 500. This is approximately 100 words.
Step 11: Duplicating a Section
 If you need two similar sections, it can be advantageous to simply duplicate them. We require another section exactly like the Female Protagonists, but for Male Protagonists. Rather than creating the questions again, we will just copy the entire section.
To duplicate a section, scroll to the top of the section, and click on the three-dot-menu and choose “Duplicate section.”
You will now have an exact copy below your current section.
Step 12: Modifying the Duplicate
Rename the duplicated section to Male Protagonists.
Change the word women to men in the first question.
Change the word female to male in the second question.
Step 13: Beautifying the Sections
Add an image of a female video game character to the top of the Female Protagonists section, and a male video game character to the top of the Male Protagonists section
I used Link and Zelda from The Legend of Zelda series.
Step 14: Admire your Form
Now that you’ve completed your new section, click the preview button and navigate through your form. Note that after the first section, you will reach the second sections, and then the third section, before you can submit.
Looks pretty good, but we’re not done yet!
Branching Sections
What we will learn in this section:
- How to choose sections based on answers
Step 15: Understanding Section Connections
Scroll all the way back to the last question of section one. Note that at the end of that section it says “After section 1 Continue to next section”. If you click on Continue to next section you will open a dropdown menu:

You can choose what should happen once the user completes that section. Should that end the form, leading to submission, or should it lead to section 3, or simply continue to the next numerical section?
We are not going to be changing this. But – it is important to understand that you can select what section will be displayed after clicking the NEXT button.
Step 16: Choosing Sections Based on Answers
You do not need to send your users through each section on your form. There may be times when you want users to be asked certain questions only if they gave certain answers to a prior question.
For our purposes, we are going to use the last question in the first section to determine if the user will be asked the Male Protagonist questions or the Female Protagonist questions.
Click on the Do you prefer games with Male protagonists or Female protagonists? question. Click on the three-dot-menu, and select Go to section based on answer.

Once you have selected this, each of the multiple choice options will display a dropdown menu allowing you to choose which section that specific answer will send the user to.
Set the options so that answering Male Protagonist will send the user to the Male Protagonist section, and that answering Female Protagonist will send the user to the Female Protagonist section.

Step 17: Setting a Section Submission
If you preview the form, you will notice that if the user selects Male Protagonist, they will go to the final section, and be able to submit their results. However, if they select Female Protagonist they will be send to the Male Protagonist section after clicking NEXT in the Female Protagonist section.
Refer back to Step 15 for information on how to change a section to submit upon completion, rather than continuing to the next section.
Scroll to the bottom of Section Two, click on Continue to next section and change it to Submit form.
Step 18: Reflect on How Great You Are
That’s it. You’re done. You have a beautiful form with a number of sections, integrated video and images, and helpful titles.
At this point you have learned all the advanced features of basic Google Forms.

Next Steps
In our Next Part we will learn how to create a self-marking quiz, or a more advanced test that self-marks the multiple choice questions, while allowing the creator to mark the written responses.

Hurrah, that’s what I was searching for, what a material!
present here at this web site, thanks admin of this web site.
LikeLike