

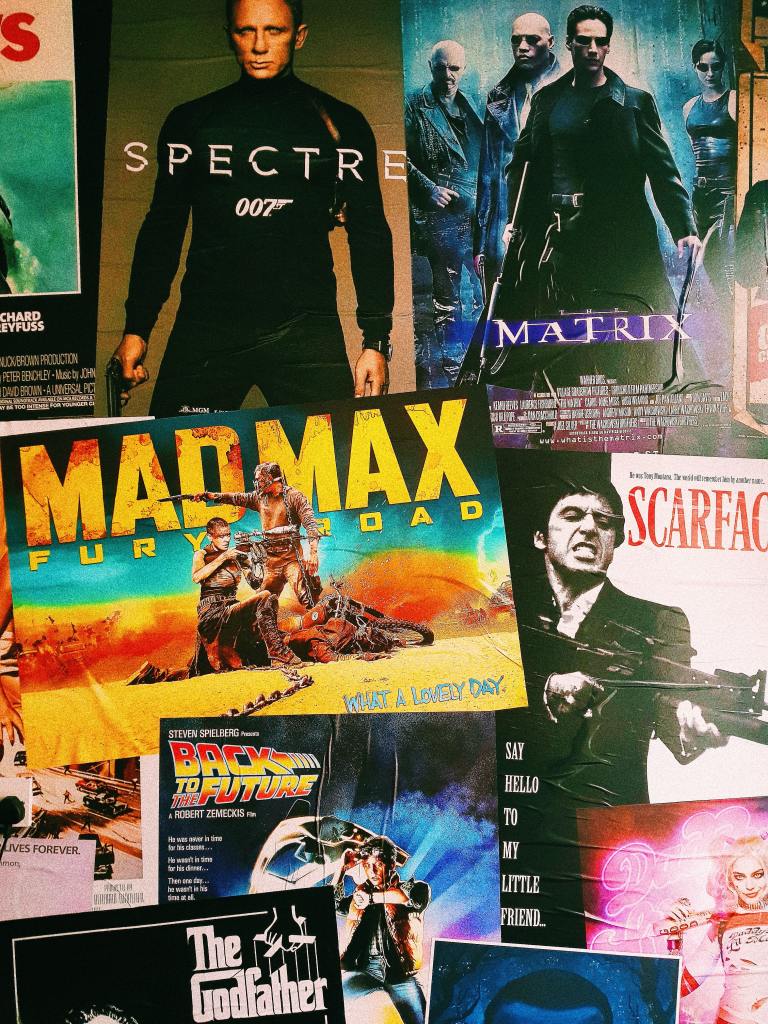
Designing a movie poster requires attention to detail, use of symbols and symbolism, an understanding of how to merge text with visuals, and how to appeal to an identified target audience. Through the prior lesson that focused on looking at movie posters, as well as the one that saw students learning about the Media Triangle a strong foundation has prepared your class to participate in this culminating project that will release responsibility to them.
What will the focus of your movie poster be? A short story you have read, a personal choice reading text that your students have been engaging with, or something else entirely? That’s up to you. But, once you’re made your selection, they are free to work on this task to the best of their abilities!
English Course Pack: Unit One – Literacy Skills

This assignment is part of the The Full English Course Park. This piece is part of Unit One: Literacy Skills, which focuses on creating a strong foundational understanding of literacy skills, PEE paragraph writing, and embedding quotations as textual support.
If you would like to say thanks, consider buying me a coffee. But that is neither required, nor expected.
1.16 – The Movie Poster Assignment
Step One: Explain the Movie Poster Assignment
This is the first step. Hand out the assignment sheet, and have the class focus on page one. Sometimes I like to tell students to read over the page indepenedly, and then circle the most important word on the page.
Once two or three minutes have passed, I ask them to all shout out their circled word at the same time. Instantly there is a lot of valuable feedback that shows what they were focusing on, and where you should target your teaching. Plus, it’s fun. Kids like to yell. Constructive chaos is great.
You can then have each student quickly say their word one at a time, before you highlight the four check boxes at the bottom of page one:
- Detailed visuals: Visuals that fully convey the theme of your text
- Text Title: Your text’s title must be prominently integrated
- Three symbols: Select three objects that have symbolic significance
- Tagline: Think of a brief line that relates to your text, and entices readers
These four things are what is required, and what will make up the bulk of the evaluation. These also happen to be the four things you looked at in the exemplar poster during the Introduction to Movie Posters Slide Deck in the last lesson.
Step Two: Select the Subject of the Movie Posters
Here is where your own teaching style will point you in one of many directions. You could direct students to create the poster based on any of the short stories you’ve looked at during this unit:
But, you may have been asking your students to engage in Personal Choice Reading throughout this unit. In that case, you might also offer them an option to use that text as the subject of your movie poster.
What I tend to do is allow my students to choose a graphic novel from our class suggestions, and demonstrate their literacy skills based on that text. This often happens during the beginning, or end of a class. The graphic novels are organically woven throughout the entire unit, and they scaffold an understanding of Literature Circles which will become integral to our course as the units progress.
But, if you want to be completely hands off, you can have them invent a movie and create a poster based on any of the following ideas:
- An autobiographical piece
- A childhood television show
- A favourite video game
- An app they enjoy, converted into a movie!
- (Or, something completely different. It’s up to you!)
Once you’ve given them that stepping stone to focus their creative endeavour, it’s time to move forward.
Step Three: Planning the Poster
It’s your time to step back. This first unit has been very teacher-centric, and hands on. But now it’s time to start training students to be autodidacts and create for the pleasure of creation.
Indicate to them that there are some planning questions on Page 2. Suggest that they complete those before moving on to the next step. But, ensure they know that this is optional. With any luck, students will see the benefits of using graphic organizers to complete their task, however they should see that the rubric – unless modified, which you’re free to do – is focused on Media alone.
Step Four: Planning the Design
Here we go: Page 3. Suggest students complete four sketches, and then show them to elbow partners to garner feedback before choosing which of the four to focus on. Let them know these sketches will help them plan the tagline, the title, and the layout of the symbols.
Remind them of the video clips that highlighted the different styles they can draw from.
Step Five: Planning the Explanation
The final graphic organizer will set their course for the presentation of their poster. If students fully fill in these four boxes, and simply read what they created, they will demonstrate full understanding of their media piece. This explanation, coupled with the created poster, is all they need to ensure they fully demonstrate all the requirements outlined in the rubric.
But, again, you are releasing responsibility. Let them know that this is an optional task, and that filling it in will benefit them.
What you don’t need to say – or what you might want to explicitly state – is that this is an informal demonstration of reading and writing skills. Students who failed to demonstrate some of those skills earlier can use the submission of this piece, with four strong paragraph responses that highlight the importance of key details, can be used to fill in gaps in their demonstrations of learning.
This might also enhance their existing grades in a prior piece with similar curricular demonstrations, as it is a more recent, and possibly more consistent, demonstration of learning.
Step Six: The Poster Creation and Presentation
Students have now been provided with everything they need to succeed, except for the most importnat resource: time.
Provide as much time as you think they require. Two hours, spread out over one or more classes should be more than enough time.
When it comes time to present, I like to ensure that my students have access to technology, and then request that they create a video-presentation of their assignment. This ensures that they are aware of the length (Normally 1.5 – 2.5 minutes is more than enough) and you can ask them to trim their presentation video to meet your expectations.
Additionally, this demonstrates an opportunity you will present later in your course – oral presentations can be submitted as videos that the class will watch, to honour the effort and creation and so that everyone can benefit from the piece. But, by presenting as a video, it’s a quick way to scaffold supports for students who feel uncomfortable speaking in front of the class. Not a problem – they can challenge themselves to present live, one day, while still providing you with demonstrations of oral skills.
The Impact
No, there isn’t an oral mark for this. It’s just a media mark. But notice how you, as the teacher, can pull demonstrations of learning from all four strands?
With just one unit down, you should have enough grades to provide students with an understanding of their learning. You should have a strong understanding too. You’ve also demonstrated that you’re willing to give multiple assessment opportunities, so that one assignment isn’t the only option for success or failure.
Additionally, you’ve provided students with a chance to grow as autodidacts and have set them up with an understanding that they will be presented opportunities for learning, and success, but that it will be up to them to take advantage of them.
You provide the tools, and it’s up to them to create.
What a unit, jam packed with resources, direct teaching, and foundational structuring.
Don’t worry. It’s not all like this. The hard work is behind you (for students and teachers). The real fun is just around the corner!
English – Unit One: Literacy Skills

1.17 – RICH Reading Log (English Lesson)
RICH Reading Log honours Personal Choice Reading. Reading Indenpendent CHallenges is a form a Personal Choice Reading that students engage in during almost every class.…

1.15 – Movie Posters: Slide Deck (English Lesson)
Movie posters are incredible media texts, because they combine both art theory, and advertising. They can be appreciated as pure visual texts, but also as…

1.14 – Teaching the Media Triangle (English Lesson)
The Media Triangle is an important tool that students will use to discover the messages and meaning of any text. Rather than simply looking at…

1.13 – In-Class Writing: Topic Journals (English Lesson)
Topic Journals are an excellent way to gauge students’ Reading and Writing skills, through in-class writing opportunities. Topic Journals will focus on text-to-theme, as well…

1.12 – The Swan as a Metaphor for Love: Short Story – Connecting (English Lesson)
The Swan as a Metaphor for Love is a short story written by Amelia Gray and can be found online at Joyland Magazine. It is…

1.11 – Connecting: Slide Deck (English Lesson)
When students connect to text, they build deeper meaning both with the text, and with what they connect it to. By teaching how to make…

1.10 – Determining Importance & Summarizing: Slide Deck (English Lesson)
Building students’ literacy skills by focusing on Determining Importance and Summarizing allows them to read for meaning, and decode in an effective way that leads…

1.09 – Taylor Swift: Short Story – Questioning (English Lesson)
Taylor Swift is a short story written by Hugh Behm-Steinberg and can be found online at Gulf Coast Magazine. It is a strange story about…

1.08 – Questioning: Slide Deck (English Lesson)
The Questioning slide deck follows the same framework that all the literacy skills slide decks do. It starts by asking students what the skill entails,…

1.07 – Made out of Meat – Short Story Visualizing and Inferring (English Lesson)
Terry Bisson’s story, They’re Made Out of Meat, is a perfect way to put inferring into practice. After reading the story aloud, students are asked…

1.06 – Inferring: Slide Deck (English Lesson)
This slide deck introduces students to the literacy skill, Inferring. It is designed to be moved through slowly, scaffolding an understanding of Inferring for students…

1.05 – The Drawbridge: Character Monologues (English Lesson)
The Drawbridge Character Monologue assignment builds upon the now-familiar text that was explored in 1.04 – The Drawbridge: PEE Paragraphs, asking students to consider the…

1.04: The Drawbridge: PEE Paragraphs (English Lesson)
The Drawbridge PEE Paragraph activity brings together all of the learning that has taken place so far. The beginning of the lesson should be run…

1.03: Embedding Quotations: Slide Deck (English Lesson)
Embedding Quotations is a necessary skill that students will use throughout their years in secondary and post-secondary education. This slide deck introduces the idea of…

1.02: Alligator River (English Lesson)
Alligator River is a short story that will have your class yelling at each other, screaming at each other, becoming enraged at each other. And…

1.01: The Nametag Project (English Lesson)
The Nametag project begins the school year with students creating a piece that visually represents who they are and presents the challenge for them to…
English Course Packs: Full Units
Unit One: Literacy Skills
Unit Two: Poetry
Unit Three: Literature Circles
Unit Four: Creative Writing & Choose Our Way Tales (In Progress)
Unit Five: Essay Writing (In Progress)
Unit Six: Culminating Tasks (In Progress)

Written by…
Michael Barltrop has been teaching since 2006, integrating comics, video games, and TTRPGs into his classroom. He has been the head of English, Literacy, Special Education, and Assessment & Evaluation and Universal Design. Feel free to reach out through Twitter @MrBarltrop!
Feel free to support the website hosting by buying him a coffee or sharing this post on facebook, twitter, or whatever social media is trending these days.
